Ingredients
- 1 Medium Yellow Onion chopped
- 1Tbl Olive Oil
- 4-5 sprigs fresh thyme
- 1 C shredded extra sharp cheddar – or 1/2 C of extra sharp cheddar and 1/2 English Coastal Cheddar (for a slightly sharper/saltier taste)
- 1/3 C dry white wine
- 1tsp of Worcestershire Sauce
- 1/3 C Beef broth
- 520g bread flour (360g white, 160g whole wheat)
- 365g water
- 2tsp fine sea salt
- 1/3 C sourdough starter
Directions
Prepare Starter
About 4 hours before mixing ingredients, add a heaping tablespoon of flour and equal amount of water to your starter. Mix thoroughly and let it sit on the counter to get nice and bubbly and raise to room temperature.
Prepare Onions
This is essentially a small version of how I make French Onion Soup.
In a large skillet, bring olive oil to medium-high heat and add onions. Cook until translucent and add in thyme sprigs, stirring regularly. Sauté for another couple of minutes until onions brown and add in white whine. Scrape bottom of pan and reincorporate juices throughout the onions.
Cook down until almost dry, then stir in Worcestershire sauce and beef broth. Reduce heat to medium-low and simmer until almost all liquid has evaporated.
Turn the onions out onto a cutting board and give them a final rough chop, then spread it all out across cutting board to cool.
Mixing ingredients
In a large bowl, mix together flour and salt. Add in cheese and toss with flour to distribute. In a separate bowl (or 2 C measuring cup) whisk together water and 1/3 C of happy (bubbly) starter. Pour liquid over flour and cheese, and add cooled onions. Scraping the sides with a spatula, incorporate all ingredients until a sticky dough is formed. If needed, add any additional water 1 tsp at a time.
No Knead! Just stretch
Instead of kneading the dough, I stretch the dough gently to create long gluten strands which, in-turn, create nice texture and excellent pockets for air when it rises in the oven.
Turn out the dough onto a clean and dry counter top (I have granite, but you can use a rolling mat for a stickier surface), and using wet hands, stretch the dough and fold it back across itself two times (both lengthwise and width).
NOTE: The dough will be sticky so make sure your hands are wet to avoid getting it too much on yourself. Also, do not flour the work surface. While water evaporates off the surface, flour absorbs moisture and you don’t want to add any more flour than you have to.
Using a dough scraper, remove the loaf off of the counter and place it back in the mixing bowl, fold side down. Cover the bowl with a towel and let it rest on the counter for 15 minutes. Repeat this process three more times.
On the last stretch and fold, dampen your kitchen towel and cover the bowl. Let the dough rise on the counter overnight (8-12 hours).
Seriously, go to bed, watch the Lord of the Rings trilogy or anything to take up the next 12 hours of your time. This will help the dough rise gently and naturally sour.
After your 12 hours, the dough may not appear fully doubled. Don’t worry, it likely wont. But you should notice a good puffiness and it will spring back when you press it lightly with a dry finger.
Turn dough out to counter for one last stretch and shape for your loaf. Place dough into floured banneton (proofing basket) or parchment-lined bowl, with final folds facing down to the bottom of the rising vessel. Find a level spot and set it in the refrigerator for 1 hour. This will tighten up the surface of the dough to score and help it hold the final shape for baking.
Put your Dutch oven in the oven, and preheat to 500F.
I use a large 7qt Dutch oven because I want plenty of room around the loaf for rising and handling of it when I put it in/out of the Dutch oven.
After 1 hour, remove loaf from refrigerator.
- If using a banneton, gently remove and turn onto a piece of parchment (or silpat). Using your lame/razor blade, score the top with a fancy, or not so fancy design.
- If using parchment and a bowl, place a new piece of parchment (or silpat) over the top of the bowl, and flip. Discard the old piece of parchment, then using your lame/razor blade, score the top with your preferred design.
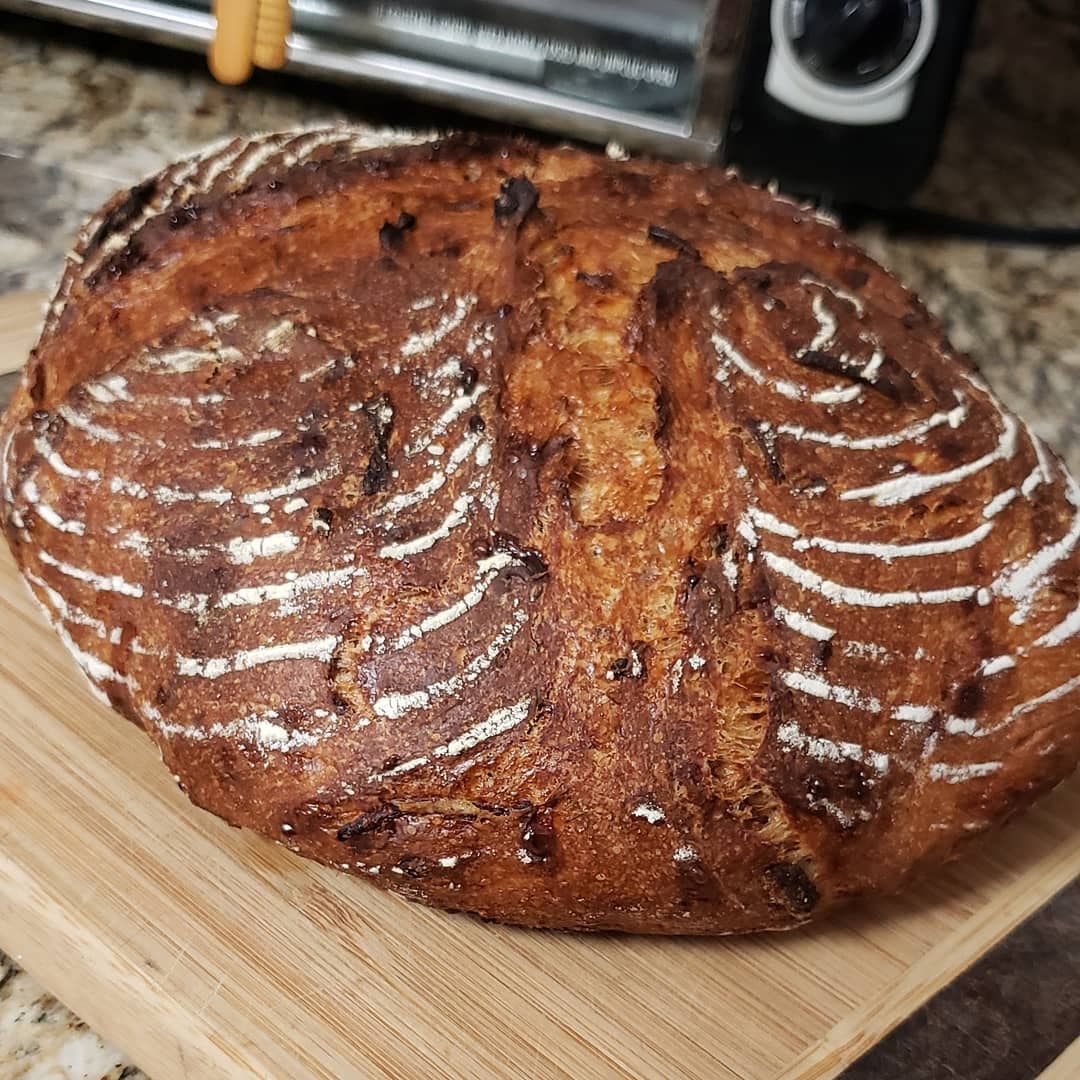
I just scored mine with an X because I like how the banneton lines created concentric circles on each quarter. But have as much fun with your designs as you wish. Tip – hold the blade at 45 degrees when you cut.
Remove the HOT Dutch oven, open the lid and carefully place the loaf and parchment into the center. Now, put the lid back on and return everything to the oven. Bake for 20min. Remove lid from Dutch oven, and reduce temperature to 450F. You should notice the loaf has risen across your score marks and should be a light golden color.
Bake uncovered for another 20-25min, until a thermometer registers 208F in the center of the bread. Be careful not to push the thermometer too far down or else you’ll be measuring the temperature of the bottom crust, not the center.
When you hit 208F, remove the bread from the Dutch oven and set it on a cutting board or cooling rack. You should hear it crackle as it comes out, and it should sound hollow if you thump the bottom with your thumb.
Now the hard part.
Step back and admire your work while you let the aroma fill your house for 30min-1hr as it cools.
Slice and serve with your favorite soup, make a sandwich, or eat with a pat of butter while it’s still warm. Either way, enjoy!